Tampilkan postingan dengan label Appetizer. Tampilkan semua postingan
Trout Caviar “Fish & Chips” – And the Oscar for Best Hors d'Oeuvre Goes to…

Trout Caviar “Fish & Chips” – And the Oscar for Best Hors d'Oeuvre Goes to…

Sure, you could serve some high-end Beluga or Ossetra caviar at your Oscars viewing party, but the problem with that plan is you’d have to get rich first. I’m not saying you won’t eventually be rolling in it, but the Academy Awards are Sunday, and we don’t want to rush you.

Instead, you can go with a more affordable option like the gorgeous trout roe seen glistening herein. This was only $25 for a 2-oz jar, and that’s purchased in San Francisco, one of the most expensive places on earth, so I’m hoping you can do even better than that.

It’s so obvious that I didn’t even mention it in the video, but of course this will work with any type of caviar. Having said that, when you consider value, it’s hard to beat these golden beads. Trout roe has a fresh, clean, briny flavor, and an absolutely beautiful texture. The feeling of those little, subtly salty eggs popping on your tongue is one of life’s great food experiences.

As far as portioning goes, if you use as much as I did on the first batch (pictured right), which was about 1 gram per chip, you’ll get between 50-60 hors d'oeuvres. If you want to stretch things a little further, then do smaller 1/2-gram portions, and get 100-120 still amazing tasting bites.

If you’re like me, and haven’t seen any of the movies yet, the only good reason to go to an Oscars party is for the food and drinks; and getting to enjoy something like these caviar “fish & chips” will make sitting through all those acceptance speeches almost worthwhile. Enjoy!


Ingredients for 100-120 bites (using 1/2-gram of roe per chip)
2 oz golden trout roe (or any other caviar or roe)
120 potato crisps or chips (I used original flavor Popchips)
about 1/2 cup sour cream
chives as needed
Pancetta-Wrapped Leek Gratin – Simply Amazing

Pancetta-Wrapped Leek Gratin – Simply Amazing

I’m all about simply prepared vegetables, but every once in a while I need to cover them in caramelized pork and cheese, and this stunningly delicious pancetta-wrapped leek gratin was one of those times. I love those times.

This “umami bomb” is so flavorful and satisfying, it almost seems disrespectful to serve it as a side dish. Pair this with a slice of buttered bread, hedge your bets with a glass of Sauvignon Blanc, and enjoy a truly special lunch.

For extra credit, after you finish your meal, call your best French friend and describe what you had. They will love and hate you for it. So, whether you make this for lunch, or use it to upstage a steak or grilled piece of salmon, I hope you give this great leek gratin a try soon. Enjoy!


Ingredients for 2 portions:
3 large leeks
about 4 oz pancetta
2 tsp olive oil
salt, pepper and cayenne to taste
1/4 cup chicken broth
1/4 cup drinkable white wine
1/3 cup heavy cream
finely grated Parmigiano-Reggiano cheese as needed
chives to garnish
The Food Wishes' Chicken Wing Collection

The Food Wishes' Chicken Wing Collection

Just in case you haven't decided on a chicken wing for tomorrow's Super Bowl party, maybe this will help. Here, for the first time, we've pulled together every single Food Wishes' chicken wing recipe into one, convenient post. Enjoy!


Jerk Chicken Wings

In the spirit of full disclosure, these will be the wings I'll be enjoying for the game.

Garlic Parm Hot Wings

If casual dinning restuarants have taught us anything, it's that people love garlic-parm whatever.

Original Buffalo Chicken Wings

There's no way to prove this is the original recipe, which is a probably good thing.

Clifton Springs Chicken Wings

By far, our most popular and highest-rated chicken wing recipe.

Pastrami Chicken Wings

Sure, pastrami sandwiches are awesome, but they don't have any bones! Now, these on the other hand. 

Spicy Orange Chicken Wings

I can't say who I stole this spicy orange glaze from, but it rhymes with "Panda Express." 

Peanut Butter & Pepper Jelly Chicken Wings

This is no gimmick! Okay, it is, but it's an incredibly delicious gimmick.

Sweet and Hot Mustard-Glazed Chicken Wings

Hey, there's a reason honey-mustard is the second most popular chicken nugget sauce in the world.
Bacon Jam – Take That, Fruit!

Bacon Jam – Take That, Fruit!

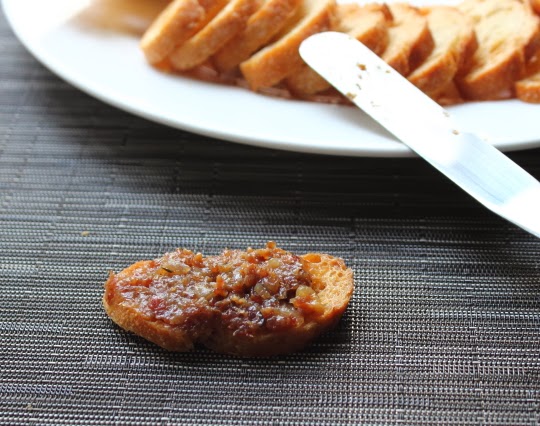
At the end of the video, I joke that if this bacon jam were the only thing you served at your Super Bowl party, people would still leave raving about the food. That wasn’t a joke. Such is the profound deliciousness of this magical, spreadable bacon.

I’ll have to admit that the first time I heard about bacon jam, it didn’t strike me as a very good idea. I loved the part about frying tons of bacon crispy, but then you want me to add it to a bunch of wet onions? Why would I do that? As usual, I was wrong. Despite losing its crispiness, the intense caramelized bacon flavor, and sweet/tart/peppery punch of this “jam,” more than make up for it.

While I'm officially posting this as another Super Bowl snack idea, its potential uses go way past the big game. One taste and the mind reels with possibilities. While impressive served simply on a chip or crisp, this stuff will turn a grilled cheese sandwich into something beyond our world…and don’t even get me started on the hamburger applications.

Such pleasure does not come without its price, however. This takes some time to make, and there is expert-level stirring involved, but what a small price when you consider the final results. Whether you do this for your Super Bowl party, or other festive occasion, I hope you give this amazing bacon jam a try soon. Enjoy!


Ingredients for about 3 1/2 cups of Bacon Jam:
1 1/2 pound bacon, cooked crisp, chopped fine
2 tsp butter
2 tsp reserved bacon fat
4 large yellow onions (about 3 pounds), diced
1 tsp salt, plus more to taste
1/4 cup brown sugar
1/4 cup sherry vinegar
1 1/2 tsp fresh picked thyme leaves, divided (1 tsp cooked in, 1/2 tsp at the end)
1 teaspoon black pepper
pinch of cayenne
1/2 cups water
2 tsp balsamic vinegar
2 tsp extra virgin olive oil
Jerk Chicken Wings – Classic Jamaican Super Bowl Food

Jerk Chicken Wings – Classic Jamaican Super Bowl Food

I’m not sure why I hadn’t thought of this before, but what more perfect marinade and glaze for a Super Bowl hot wing than a Jamaican jerk sauce? These jerk chicken wings were so flavorful, so different, and so additively delicious, that I may have eaten my last Buffalo wing. 

Okay, I didn’t mean that, but these really are amazing; a perfect balance of sweet, sour, salty, and spicy. I'm usually pretty casual about you changing my recipes, but I’m going to have to insist you not change any of the key ingredients, which are, every one of them. 

I guess this could work with other hot peppers, but the fiery, super-fruity Habanero (or Scotch Bonnet if you can find it) is critical for achieving true magic here. You’ll find them in any decent market, and they are very expensive per pound, but they’re very light, so three or four certainly won’t break the bank.

I mention in the video to marinate at least 8 hours in the fridge, which is the preferred method, but if you’re in a hurry, like I was, you could just leave it out on the counter at room temperature for two hours instead. Keep it covered, and give it a stir every 15 minutes or so, but that will get you pretty close to the colder, slower refrigerator method.

So, if you’re looking for a little change of pace this year, why not take a break from those same old wings (sorry again, Buffalo), and give these tasty jerk wings a try instead? Enjoy!


Ingredients for about 24 Jerk Chicken Wing Drumettes:
3 lbs chicken wings
1/2 yellow onion, chopped
6 garlic peeled cloves
1/2 cup green onions, sliced
3 Habanero chili peppers, seeded, chopped
2 tablespoons freshly picked thyme leaves
1 tablespoon kosher salt
2 teaspoons black pepper
2 teaspoons ground allspice
1 tsp dried thyme
1/2 teaspoon cinnamon
1/2 teaspoon cumin
1/2 teaspoon freshly grated nutmeg
2 tablespoons vegetable oil
3 tablespoons soy sauce
2 tablespoon packed brown sugar
1/3 cup fresh lime juice, about 3 juicy limes

Blend all ingredients and marinate 8 to 12 hours in the fridge; or 2 hours at room temp.
- Bake 20 min at 450 F.
- Paint and turn, bake 15 minutes more
- Turn and paint, and bake 10-15 minutes more, or until well-browned and tender.
Kentucky Beer Cheese – Love at Third Bite

Kentucky Beer Cheese – Love at Third Bite

Very few love Kentucky Beer Cheese at first bite. As you crunch your first taste, the palette quickly identifies a sharp cheddar cheese spread, but then stale beer fills the nose, and you instantly think, “I should have gone clam dip.”

But after three or four bites, you stop thinking about your college dorm room carpet, and your palette adjusts to the unusual flavor profile, and this humble cheese spread becomes as addicting as any I’ve ever had. In a way, it’s sort of analogous to drinking your first beer, but that’s a whole other post.

The texture is much smoother and creamier than it looks, and that little hint of raw alcohol provides a fermented funkiness in the background that is the key to the recipe. Well done, Bluegrass State. Well done. By the way, you can upgrade the beer if you wish, but then you will not be eating real Kentucky Beer Cheese.

People around those parts may argue about the amount of pepper, or if you should throw in a chunk of cream cheese or not, but everyone agrees that this spread requires a cheap, domestic beer. Preferably from a can.

So, if you’re looking for something a little different for your Super Bowl party, I hope you give this Kentucky Beer Cheese recipe a try. If it’s a big hit, you can bring it back for your Kentucky Derby party. I’m sure it’s fabulous with mint juleps. Enjoy!


Ingredients for  about 3 cups Kentucky Beer Cheese:
16 ounces of cheese
2 cloves garlic, minced fine
1 teaspoon dry mustard
1/2 tsp freshly ground black pepper
1/2 tsp cayenne powder
1/4 tsp salt
1/4 tsp Tabasco sauce
1/4 tsp Worcestershire sauce
1 cup flat beer
Chicken & Mushroom Chimichanga – A Thingamajig of Beauty

Chicken & Mushroom Chimichanga – A Thingamajig of Beauty

As legend has it, many years ago in Tucson, AZ, a woman accidentally dropped a burrito into a deep fryer. She started to blurt out a common Spanish swear word, but remembering her kids were in the kitchen, yelled out “chimichanga!” instead. She let it fry golden and crisp, and the rest is culinary history.

If you’re wondering, Chimichanga translates to “thingamajig,” which is fitting, since that’s kind of what this is. A thingamajig stuffed with whatever. In this case, whatever was a very tasty mixture of chicken, mushrooms, poblano chilies, and pepper Jack cheese.

While that particular combination is highly recommended, this is more of a technique video, so when it comes to the filling, I encourage wild experimentation. We used raw chicken here, but Chimichangas are also great for using up leftover, cooked meats. Just cube it up, toss it in when the vegetables are done, and proceed as shown.

And don't feel like you have to stay in the Tex-Mex zone. This versatile, folded and fried tortilla could make a fantastic delivery system for all kinds of ethnic foods. Anyway, no matter what kind of filling is used, or how it’s seasoned, I think everyone will agree that it’s never a good idea to curse in front of children. I hope you give this delicious son-of-a-gun a try soon. Enjoy!


Ingredients for 4 portions:
(exact measurements are not critical, as you can stuff these with anything that fits)

For the filling:
1 tbsp vegetable oil, divided (half for veggies, half to cook chicken)
1/2 cup diced onions
1/2 cup diced poblano peppers
1/2 cup sliced mushrooms
12 oz boneless skinless chicken breast meat, cut in 1/2-inch cubes
salt, freshly ground black pepper, cayenne pepper to taste
1/4 tsp cumin
1/4 tsp chipotle, smoked paprika, or other hot or mild ground chili pepper
pinch dried Mexican oregano
1 or 2 tbsp cold water to deglaze pan once chicken is browned
4 ounces grated pepper Jack cheese

Also:
4 large flour tortilla (at least 10-inch wide)
1 egg white
2 tbsp vegetable oil for pan-frying
sour cream, guacamole, and salsa to garnish, optional
Crab-Stuffed Deviled Eggs – I Love to Say I Told You So

Crab-Stuffed Deviled Eggs – I Love to Say I Told You So

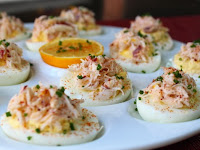
I love deviled eggs, and have probably had fifty different versions over the years, but these crab-stuffed beauties may be my favorite. The sweet crab is a perfect compliment to the spicy eggs, but above and beyond the delicious flavors, these just look extra special. Okay, that’s enough about the recipe…now, on to more important matters.

Considering the fact that we’ve done almost 1,000 uploads, we’ve had very few controversial recipes. And by “controversial, I mean videos that caused vigorous debate about whether the recipe actually works as shown. One such video was our “How to Make Perfect Hard Boiled Eggs.”

While most had no issues, a small but vocal group claimed the recipe didn’t work at all. Some went so far as to say the video was a hoax, as if the egg industry had gotten to me, and convinced me to trick my viewers into wasting eggs to increase sales. I’ll admit, it is a brilliant plan, but it’s not true.

To prove my innocence, I’ve used the exact same method here, and once again, perfection. As long as you’re using a decent pot (as in not paper-thin), enough water, and can manage to successfully set a timer, I’m not sure what can go wrong. By the way, I used cold eggs, so that’s not an issue, as some surmised after the first tutorial. To summarize: I told you this works.

Regardless of how you cook your hard-boiled eggs, this would make a stellar hors d'oeuvre for any special occasion meal. You can be as frugal or extravagant as you want, and the garnishing options are pretty much limitless. Speaking of garnishes, that is a lemon, and not an orange! It's actually a Meyer lemon which have a much warmer color than standard lemons. I hope you give these a try soon. Enjoy!


Ingredients:

For the bottoms:
*6 large hard-boiled eggs (makes 12 pieces)
2 oz fresh crab meat, chopped
3 or 4 tbsp mayonnaise, or enough to achieve desired consistency
few drops of Worcestershire sauce
1 tsp Dijon mustard
1 tsp lemon juice
2 tsp chopped tarragon
1/2 tsp hot sauce or to taste
pinch of old bay
salt and pepper to taste (don't be shy with the salt)

For the crab topping:
2 oz fresh crab meat, shredded slightly
1 or 2 tsp crème fraiche or sour cream
lemon zest of one lemon
Aleppo pepper to taste
salt if needed
Fresh chives
Cayenne

* I only made 12 portions, but this method will work with more. Just be sure your eggs are cover by at least an inch or two of cold water, and proceed as show.
Turkey Matzo Ball Soup – That Old Thanksgivingukkah Classic

Turkey Matzo Ball Soup – That Old Thanksgivingukkah Classic

Soup is always an obvious choice for leftover-turkey-themed videos, but it wasn’t until I heard about “Thanksgivingukkah,” that I knew that soup would be turkey matzo ball.

This year, Thanksgiving and the first day of Hanukkah fall on the same date for the first time since 1888, and this rare occurrence has been deemed, “Thanksgivingukkah.” And when we say rare, we mean rare, as this convergence will not happen again for another 77,000 years!

As I mention in the video, while pleased with my matzo ball skills, I’m not sure I’ve ever had the real thing (if that even exists), and so I don’t have anything to measure mine against. I’ve had it at delicatessens out here, but never in NYC, or other more legit locations. I’m using what seems to be a fairly standard formula, and they are quite light and tender, so until informed otherwise, I’m going assume these are pretty good.

However, there is one thing I would love to know. Why do “we” boil the matzo balls in salted water, instead of the soup? I’ve heard it’s so the broth doesn’t get cloudy, but is that really all there is to it? Speaking of the broth, yours will undoubtedly be superior to mine. By the time I got to this video, I only had a few scrawny pounds of meat and bones left, and yet it still came out wonderfully flavorful.

If you use all the scraps from a decent sized bird, you should get an incredibly rich broth, which is exactly what you want to be ladling over your matzo balls. As far as extra ingredients go, I like a minimalist approach with this soup, but of course, feel free to embellish your stockpot with whatever you see fit.

Some of this will be determined by how you season your Thanksgiving bird, and I can personally verify that this year’s Peruvian version worked nicely. So, I hope you enjoy the coming Thanksgivingukkah, and here’s hoping the end of your turkey means the beginning of a delicious matzo ball soup. Enjoy!


Ingredients for 4 portions (I only served one matzo ball, but this will make enough soup for 4 portions with 2 matzo balls per serving):

For the turkey broth:
3-4 pounds of roasted turkey bones and meat scraps (use everything you have, the fattier the pieces the better)
at least 2 quarts water or chicken broth, or enough to cover
1 large onion, chopped
2 ribs celery
- simmer on low for 3 hours or until all the meat falls off the bones and it’s flavorless.
- skim and reserve at least 4 tbsp of the melted fat that rises to the top
- strain, and you should have about 6 cups of broth. If you have more, reduce down to 6 cups (do not season with salt until reduced). If you didn’t get quite 6 cups, just add some chicken broth to make up the difference.

Note: my turkey was already very well seasoned, so I didn’t need to add much to the stockpot. You can adjust your broth according, and can certainly add things like bay leaf, thyme springs, parsley stems, etc.

For the matzo balls (makes 8):
2 large beaten eggs
2 tbsp rendered melted turkey fat
1 tsp fine salt
1/4 tsp freshly ground black pepper
pinch of cayenne
2 tbsp seltzer or club soda
1/2 cup matzo meal
- Mix and chill 30 minutes at least
- Boil in salted water (1 1/2 quarts water with 1 1/2 tablespoons salt) for 30 minutes and serve with turkey broth

For the soup:
2 tbsp rendered melted turkey fat
1 cup diced onion
1/2 cup diced carrot
1/2 cup diced celery
1 garlic clove, thinly sliced
6 cups very rich turkey or chicken broth (see recipe above)
salt and pepper to taste
1 tbsp chopped parsley
1 tbsp chopped dill
8 cooked matzo balls!
Coquilles St-Jacques – Hey, Have You Tried That New Saint James Diet?

Coquilles St-Jacques – Hey, Have You Tried That New Saint James Diet?

Coquilles St-Jacques is the kind of unapologetically rich shellfish dish that we used to be able to enjoy, before the book-writing dieticians and celebrity chefs ruined it for everybody. 

Fats of all sorts were demonized, and young cooks far and wide were told to never, ever, under any circumstances, cover-up the delicate flavors of seafood with heavy sauces, especially ones containing cheese.

So, an amazing recipe like this went from classic French treat to crime against nature, and it slowly but surely started disappearing from menus. You can still find it in a few of the braver bistros, but to enjoy on any kind of semi-regular basis, you’ll need to master it at home. The good news is that’s very easy to do.

By the way, this is a great recipe for entertaining larger groups during the holidays, since it can be prepped well ahead of time. For this reason, Coquilles St-Jacques has always been a favorite of caterers and banquet chefs, and below the ingredients list, I’ll give some instructions on how they do it.

You can use sea scallops like I did, or the smaller, sweeter bay scallops, which are really nice in this. Of course, if you use bay scallops, you’ll only need a minute in the simmering wine, so be careful. No matter what you use, be sure they haven’t been dipped in a preservative solution. If you buy them frozen, which you should, the label should only say, “Scallops.”

The shells can be easily found online, or at your local restaurant supply store. Otherwise, simply use some small, shallow gratin dishes, which will work exactly the same. Find something, and give this “scallop recipe that time forgot” a try soon. Enjoy!


Ingredients for 4 portions:
2 tbsp unsalted butter
1/2 cup diced shallots
8 oz button mushrooms, sliced
salt and pepper to taste
1 cup white wine
1 pound sea scallops (about 3 scallops per person)
1/2 cup heavy cream
1 egg yolk
cayenne to taste
2 tsp minced tarragon
1 tsp lemon zest
1/4 cup grated Gruyère cheese

Broil on high, about 8-10 inches under the flame, until the scallops are hot, and the cheese is browned and bubbling. Because of the sugars in the wine and cream, the edges will brûlée or burn, but this is not a problem, and actually how it’s supposed to look.

NOTE: You can make these ahead, and refrigerate until needed. Since they will be cold, you’ll need to bring back to temperature before you broil them. Preheat oven to 350 F. and bake for about 12-15 minutes (will depend on how you constructed them), or until the centers are just warm. Switch oven to broil, and broil on high as shown. 
Farinata – Why Didn’t You Wish for This Sooner!

Farinata – Why Didn’t You Wish for This Sooner!

The third best part of this job, after the fame and fortune, is learning about unique, new foods; and this farinata video is a perfect example! Until it was requested by a Vlad Kiperman (if that is his real name), I had no idea this tasty, and dead simple recipe even existed. It’s so good, I’m kind of sad the discovery came so late in life.

Farinata is nothing more than a simple garbanzo bean flour batter, which is spiked with olive oil and salt, and baked in a very hot oven. The surface gets crusty, the edges get crispy, and yet the inside stays moist and sort of creamy. The texture is easy to explain, but the taste, not so much.

This is so simple and subtly flavored that it’s a kind of hard to describe. You may be familiar with the taste of garbanzo (aka chickpeas) in things like hummus and falafel, but here it’s not combined with other strongly flavored ingredients, and so you’re getting pure, un-cut bean. It’s going to be easier for me if you just make it and taste for yourself.

Like I said in the video, if you’ve never made this before, you should probably try a plain version to get an idea of what this stuff is all about, but after that, the sky's the limit. The options for add-ons to the batter, as well as potential toppings are virtually limitless. I hope you give this a try soon. Enjoy!


Pan Note: I know many will ask, so I’ll just say it now; yes, you can use any oven-safe 10-inch pan to make this, but I have a tough time believing it will come out as wonderfully textured as it would if you use a cast-iron skillet. Putting the batter into a smoking hot pan seems to be one of the big keys here.

Ingredients for 6 portions (one 10-inch cast iron pan):
2 cups lukewarm water
1 1/2 cups garbanzo bean flour (aka chickpea flour)
1 1/2 tsp kosher salt (about 1 tsp fine table salt)
1/2 tsp finely minced rosemary leaves, optional
5 tbsp olive oil, divided (use 3 tablespoons for the batter, and 2 tablespoons for the pan)
freshly ground black pepper to taste

Gluten-Free and Loving It


By the way, since this is made from a legume-based flour, farinata is 100% gluten-free, which should make a small, but very passionate group of foodwishers happy. My usually modus operandi when it comes to such requests and questions is a referral to Allrecipe.com’s impressive, and extensive gluten-free recipe collection, or one of my many talented GF food blogger friends. 

Speaking of which, Shauna and Danny from Gluten-Free Girl (the Beyonce and Jay-Z of GF bloggers), have a new cookbook out called, Gluten-Free Girl Every Day. If you happen to swing that way, check it out. The recipes sound wonderful, the photos are gorgeous, and the book’s getting rave reviews.
Gorgonzola Cream Sauce – Now with Cream!

Gorgonzola Cream Sauce – Now with Cream!

Since we’re heading into rich and creamy sauce season, I thought I’d use a nice hunk of Gorgonzola as an excuse to post a tutorial for a classic “cream sauce.” 

Unlike what’s passed off as the real stuff at casual dining chains, a true cream sauce contains nothing but heavy cream, and is on another level when it comes to taste and texture. A regular diet of cream sauce isn’t recommended, but once in a while, it’s nice to take a break from the old 2%, and the technique is dead simple. Simmer cream in a saucepan until it reduces and thickens slightly, flavor it however, and toss in some hot (hopefully stuffed) pasta. Done and done.

I went with a fairly mild, crumbly Gorgonzola this time, but no matter which you choose, be careful not to “cook” the cheese. You just want to stir it in on low, until it’s almost gone, and then turn off the heat. Otherwise the cheese will “break,” and you’ll have a greasy mess.

Since my mini-ravioli delivery system featured a squash filling, I decided to finish with diced apples and toasted walnuts. It was perfect with the rich sauce, and I recommend it if you’re using a similar pasta. Since the sauce itself is so easy, as in one ingredient easy, you can spend all that extra brainpower thinking of things you can add to it. I hope you give this great sauce technique a try soon. Enjoy!


Ingredients for 2 large or 4 smaller portions:
1 cup heavy whipping cream (36% fat)
salt and pepper to taste
cayenne to taste
3 ounces Gorgonzola cheese, crumbled
2 tbsp chopped Italian parsley
finely grated Parmigiano-Reggiano, optional
6 ounces dry mini-ravioli (double to 12-oz if using fresh ravioli or tortellini)
1/2 apple, diced
1/4 cup chopped toasted walnuts
Halloween Treat Special: The Devil’s Dentures!

Halloween Treat Special: The Devil’s Dentures!

We all know there’s really no such thing as a truly frightening Halloween treat, but that doesn’t mean we can’t give our guests a few moments of pause, as they process the sight of these fun, fang-filled apples staring up at them. Well, actually those are the bloody eyeball truffles staring up at them, but you get the idea. 

I kind of like the minimalist look here, but there are dozens of ways you could up the grossness factor with these. Maybe some fancy fruit gummy worms, or rice pudding “maggots?"

It’s been a while since we posted a “scary” Halloween treat, and since most tend to be sugar bombs, I thought it’d be nice to share something a little healthier. I’m assuming there will be no shortage of candy around. Enjoy!

Apple & Cheddar Cheese Soufflés – Great for People Who Stink at Folding Egg Whites

Apple & Cheddar Cheese Soufflés – Great for People Who Stink at Folding Egg Whites

After doing such a great job folding the egg whites into this apple and cheddar soufflé batter, I celebrated by dropping a measuring cup into the bowl. By the time I fished it out, cleaned the sides of the bowl, and shook my fist at the heavens, I’d lost a lot of micro-bubbles.

I pressed on, and despite my tragic encounter with gravity, the resulting soufflés were simply fabulous, which just goes to show that maybe we need to relax about this whole folding thing. Sure, more bubbles would make it go a little higher, but if you’ve never made a soufflé before, I hope this gives you some new-found courage.

By the way, I don’t know why most similar recipes call for extra egg whites. Actually, I do know; it’s to make them more visually impressive, but I think this dilutes the flavor. I use about half the egg whites normally called for, and these are still light as a feather.

If you decide to give these a whirl, please promise me you'll use a great cheddar. I used a sharp and creamy Cabot, but any other quality, aged cheddar will work. These apple cheddar soufflés are very versatile, and would make a great appetizer, a special holiday brunch starter, or deliciously different dessert. I hope you give them a try soon. Enjoy!


Ingredients for 4  (I used Le Creuset 4 3/4-ounce size):

For the apples:
1 tbsp butter, heated until edges start to turn brown
1 apple, cubed
1 tbsp sugar

For the batter:
2 tbsp flour
2 tbsp butter
1 cup milk
1/2 tsp salt
pinch freshly ground black pepper
pinch cayenne
pinch nutmeg
3 oz sharp white cheddar, or almost 1 cup grated
2 eggs, separated

Bake at 400 degrees F.  for about 22 minutes

*Assuming you don’t drop a measuring cup into your folded egg white fluffed batter, you should have about 2 cups of batter. You can divide each 1/2 cup portion into whatever sized ramekin you have, but a 4 3/4 to 5 oz size is ideal. Basically, when it’s fully puffed and browned, it’s done. And for goodness sake, serve very warm, but not piping hot!
Homemade Cream Cheese – The Labneh Way

Homemade Cream Cheese – The Labneh Way

This recipe video is inspired by a Lebanese yogurt cheese spread called Labneh, but I decided to call it homemade cream cheese because my sources deep inside Google tell me that “cream cheese” is searched for more often than “labneh.” In fairness, and with apologies to my Lebanese fans, it really is almost identical in texture and mouthfeel.

Like I say in the video, the taste is a bit bolder and tangier than that stuff from Philly, but when is that ever a bad thing? Michele found some amazing sheep’s milk yogurt at a local farmer’s market, and it was incredible in this, but I've used regular yogurt and it works wonderfully as well.

You can use it as you would any commercial cream cheese, but the honey and pistachio variation I tacked on to the end would make for a memorable holiday brunch addition. On the savory side, you can’t beat simply drizzling over some olive oil and eating as a spread with crispy bread or pita chips.

Most recipes for this say you can eat it after one day, but I really think the two-day “aging” and pressing process does great things. The taste mellows out a bit, and the texture gets even denser and richer feeling. Besides, if you don’t press it, you won’t get those signature, and ultra sexy cheesecloth fabric marks! I hope you give this homemade cream cheese a try soon. Enjoy!


Ingredients for about two heaping cups of cream cheese:
1 quart yogurt, try to get something really nice from a dairy, or use Greek-style
1 tsp kosher salt or to taste
cheesecloth
*If needed, use a paper towel to blot off any additional moisture that come to the top during the 2-day pressing in the fridge.
Note: I’ve only made this one way, so I’m not sure what happens if you deviate from the recipe and use low-fat yogurt, etc. Let me know if you try something different!